×
Menu

General

General
1

General

1. General
The tab General allows to set the display of the received data. To save the changes you added, use the button "Apply".
2

Interface language

2. Interface language
You can select interface language here. There are Russian and English languages available.
3

Monitoring table

Selected parameters are displayed in the column headings in the Track tab.
 
4

Data actuality

4. Data actuality
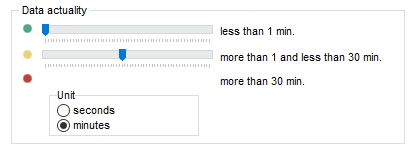
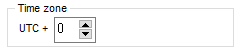
Here you can set the actuality indicators for the data displayed in the Query Panel. Then the length of the time interval (current time minus the time when the location data was last received) is compared to the set actuality values, and the system displays an indicator of the corresponding color).
 
  • Green indicator – data is current, real-time.
  • Yellow indicator – data is not real-time but recently received.
  • Red indicator – data is outdated.
 
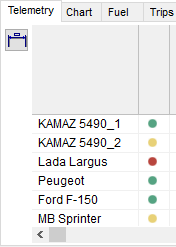
In the Query Panel, statistics on data actuality is shown.
 
In the Telemetry Panel, data actuality is indicated for every object.
5

Time zone

5. Time zone
Here you can choose time zone (by default, Moscow time zone is selected (UTC+3:00)).
6

Camera speed

6. Camera speed
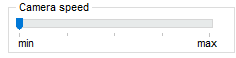
Here you can set how fast the camera changes its position when the program positions the object to the center of the screen. If you set the minimum value, the motion of the camera will be smooth.
7

Length of track during monitoring (minutes)

7. Length of track during monitoring (minutes)
Here you can set the time of the track that will be displayed in real time (minutes).
8

Aircraft track

8. Aircraft track
It is possible to display aircraft track, taking into account its flight height or projection of the flight path on the Earth's surface.
 
9

Thickness of the track line (pix)

9. Thickness of the track line (pix)
Changing of the track line thickness on the map.
10

Track color

10. Track color
To choose the color for the track line, left-click the filled area.
As a result, palette window will open:
Select the necessary fill color and click "Ok".
11

Minimum recorded length of parking period (min)

11. Minimum recorded length of parking period (min)
Here a time interval is set. If an object doesn't move during this interval or longer, then the system interprets it as a parking/idling time.
12

Break the track recording in case the interval length is exceeded

12. Break the track recording in case the interval length is exceeded
If an interval between two consecutive points exceeds the value indicated in this field, then the points are not connected with a line.
13

Height of geo zone display (m)

13. Height of geo zone display (m)
The height of a geo zone display on the Google Earth map (meters).
14

Additional settings

14. Additional settings
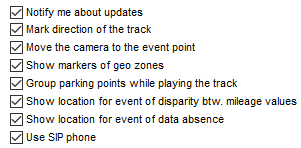
  • Notify me about updates – it allows to receive notifications about updates. 
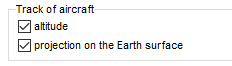
  • Mark direction of the track – object's driving direction is marked with arrows along the whole track. The amount and distribution of the arrows is changed automatically when you change the map scale.
  • Move the camera to the event point – when some event occurs, the program will move the camera to the event location. There is an instruction on event creation in the section Menu Bar - Event editor.
  • Show markers of geo zones – display of markers with the names of geo zones on the map.
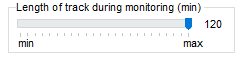
  • Group parking points while playing the track – consecutive parking/idling points are displayed in the visualisation window as one point, and time intervals between them make up the total parking/idling time.
  • Show location for event of disparity btw mileage values – this is used to display the marker of the event occurring in case the value of path traveled received from CAN, differs from that value received from GLONASS. Before this, you have to set the threshhold value for disparity between values of mileage (km) (see the section Operation control).
  • Show location for event of data absense  – this is used to display the marker of the event occurring in case the data from GPS receiver is absent. Before this, you have to set the threshhold value for disparity between values of mileage (km) (see the section Operation control).
  • Use SIP phone – to use the SIP phone function, you need to check the corresponding checkbox (put a tick here). Then in the Menu Bar, the SIP phone icon will be displayed, and in the settings, the SIP phone tab will be displayed.
15

"Ok" button

15. "Ok" button
Using this button, you save the changes and close the Settings window.
16

"Apply" button

16. "Apply" button
Using this button, you save the changes, but the Settings window stays active.
17

"Cancel" button

17. "Cancel" button
Using this button, you cancel all the changes and close the Settings window.
18

"Help" button

18. "Help" button
Using this button, you open the Instruction for this section.